Create the news detail page via frontend in Magento 2

Hi guys,
Today, I will continue introducing you about working with Magento 2 Frontend. We will continue using the Tutorial_SimpleNews module in the last post.
This is the summary after we finish this part:
- Create the news detail page.
In order to understand this tutorial thoroughly, please review our last tutorials:
- How to create a simple module in Magento 2
- Create a module with custom database table in Magento 2
- How to use Model and Collection in Magento 2
- How to create the configuration via backend for a custom module
- Adding new menu item via backend in custom module
- Grid and Form in Magento 2 Admin Panel (Part 1)
- Grid and Form in Magento 2 Admin Panel (Part 2)
- Create the news list page via Frontend in Magento 2
Ok, now let’s get started!
Step 1: Create layout file.
- Create file: app/code/Tutorial/SimpleNews/view/frontend/layout/news_index_view.xml and insert this following code into it:
<?xml version="1.0" encoding="UTF-8"?>

<page xmlns:xsi="http://www.w3.org/2001/XMLSchema-instance" layout="3columns"
xsi:noNamespaceSchemaLocation="../../../../../../../lib/internal/Magento/Framework/
View/Layout/etc/page_configuration.xsd">
    <update handle="news_news" />
    <body>
        <referenceContainer name="content">
            <block class="Tutorial\SimpleNews\Block\View" name="tutorial_simplenews_news_view"
                template="Tutorial_SimpleNews::view.phtml" />
        </referenceContainer>
    </body>
</page>
Step 2: Create controller file.
- Create file: app/code/Tutorial/SimpleNews/Controller/Index/View.php and insert this following code into it:
<?php

namespace Tutorial\SimpleNews\Controller\Index;

use Tutorial\SimpleNews\Controller\News;

class View extends News
{
    public function execute()
    {
	// Get news ID
        $newsId = $this->getRequest()->getParam('id');
	// Get news data
        $news = $this->_newsFactory->create()->load($newsId);
	// Save news data into the registry
        $this->_objectManager->get('Magento\Framework\Registry')
            ->register('newsData', $news);

        $pageFactory = $this->_pageFactory->create();

        // Add title
        $pageFactory->getConfig()->getTitle()->set($news->getTitle());

        // Add breadcrumb
        /** @var \Magento\Theme\Block\Html\Breadcrumbs */
        $breadcrumbs = $pageFactory->getLayout()->getBlock('breadcrumbs');
        $breadcrumbs->addCrumb('home',
            [
                'label' => __('Home'),
                'title' => __('Home'),
                'link' => $this->_url->getUrl('')
            ]
        );
        $breadcrumbs->addCrumb('simplenews',
            [
                'label' => __('Simple News'),
                'title' => __('Simple News'),
                'link' => $this->_url->getUrl('news')
            ]
        );
        $breadcrumbs->addCrumb('news',
            [
                'label' => $news->getTitle(),
                'title' => $news->getTitle()
            ]
        );

        return $pageFactory;
    }
}
Step 3: Create block file.
- Create file: app/code/Tutorial/SimpleNews/Block/View.php (this file will get the news data) and insert this following code into it:
<?php

namespace Tutorial\SimpleNews\Block;

use Magento\Framework\View\Element\Template;
use Magento\Framework\Registry;

class View extends Template
{
   /**
    * @var \Magento\Framework\Registry
    */
   protected $_coreRegistry;

   /**
    * @param Template\Context $context
    * @param Registry $coreRegistry
    * @param array $data
    */
   public function __construct(
      Template\Context $context,
      Registry $coreRegistry,
      array $data = []
   ) {
      $this->_coreRegistry = $coreRegistry;
      parent::__construct($context, $data);
   }

   /**
    * Get news information from register which saved in controller
    *
    * @return \Tutorial\SimpleNews\Model\News
    */
   public function getNewsInformation()
   {
      return $this->_coreRegistry->registry('newsData');
   }
}
Step 4: Create template file.
- Create file: app/code/Tutorial/SimpleNews/view/frontend/templates/view.phtml (this file will set the news data collection and declare pagination for them) and insert this following code into it:
<?php
   $news = $block->getNewsInformation();
?>
<div class="mw-simplenews">
   <?php echo $news->getDescription() ?>
</div>
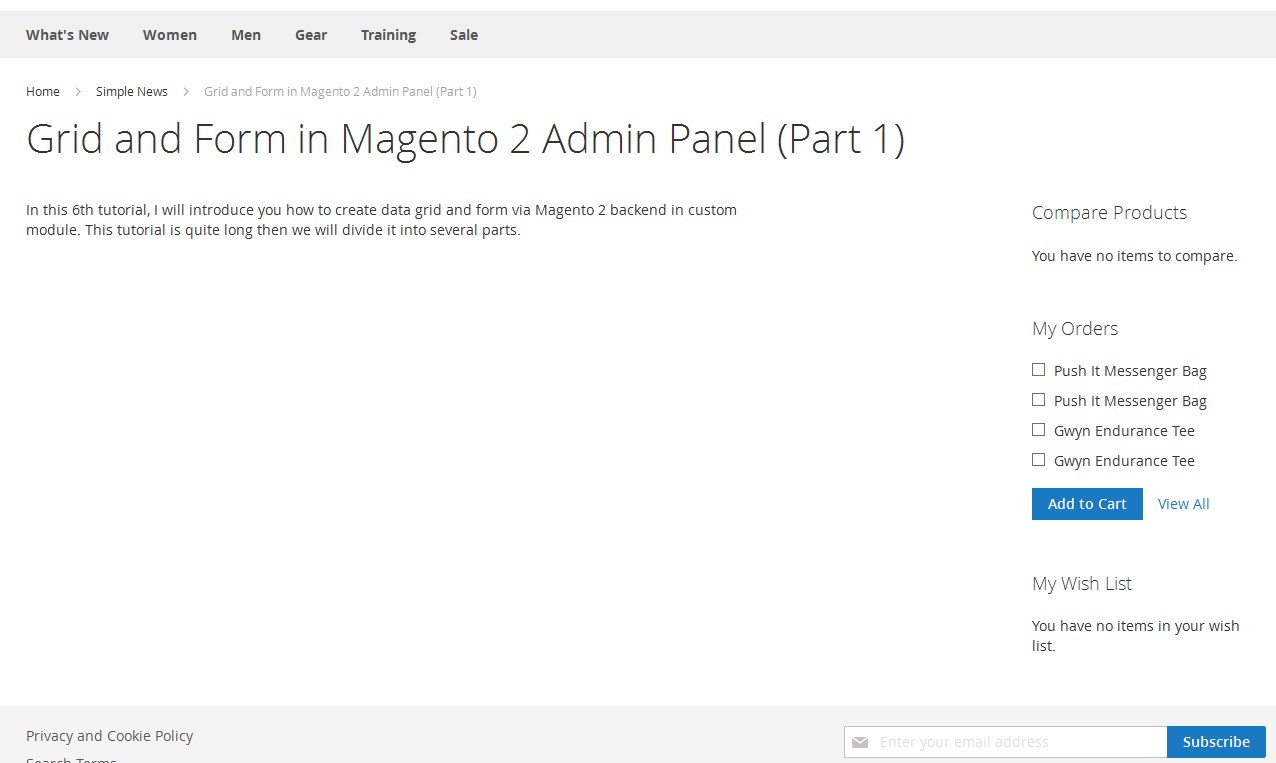
Ok, it’s done. This is the result when you access this url http://yourdomain.com/news and click a article:
That’s the second part of this tutorial. See you again in the next part, in which I will introduce you how to create latest news block and use the configuration via backend to display it (Left, Right, Disable).
Enjoy Magento 2 challenge with MageWorld‘s tutorials! Follow our facebook fanpage for further discussion.
Related Posts
Create the news list page via frontend in Magento 2

Grid and Form in Magento 2 Admin Panel (Part 2)

Grid and Form in Magento 2 Admin Panel (Part 1)