How to create the configuration via backend for a custom module

Hi guys,
How are you today? Are you ready for our next lesson on Magento 2.0?
Let‘s see what we have learnt from last tutorials:
1. How to create a simple module in Magento 2
2. Create a module with custom database table in Magento 2
3. How to use Model and Collection in Magento 2
In this post, I will introduce you how to create the configurations via Magento 2 backend.
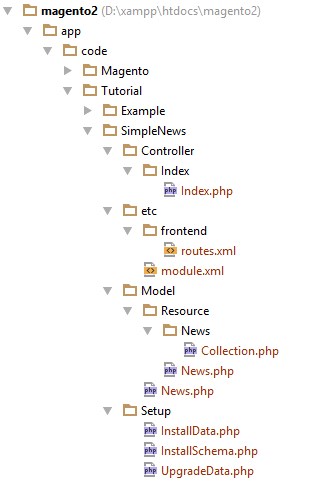
We will continue using the Tutorial_SimpleNews module for this lesson and the directory structure likes the last post:
Step 1: Create configuration in Magento system configuration.
- Create file: app/code/Tutorial/SimpleNews/etc/adminhtml/system.xml (Purpose: This file will declare your configurations in Stores > Settings > Configuration section) and insert this following code into it:
<?xml version="1.0"?>

<config xmlns:xsi="http://www.w3.org/2001/XMLSchema-instance"
xsi:noNamespaceSchemaLocation="../../../Backend/etc/system_file.xsd">
    <system>
        <tab id="tutorial" translate="label" sortOrder="1">
            <label>Tutorial</label>
        </tab>
        <section id="simplenews" translate="label" sortOrder="1" showInDefault="1"
showInWebsite="1" showInStore="1">
            <label>Simple News</label>
            <tab>tutorial</tab>
            <resource>Tutorial_SimpleNews::system_config</resource>
            <group id="general" translate="label" type="text" sortOrder="1" showInDefault="1"
showInWebsite="1" showInStore="1">
                <label>General Settings</label>
                <field id="enable_in_frontend" translate="label" type="select" sortOrder="1"
showInDefault="1" showInWebsite="1" showInStore="1">
                    <label>Enable in frontend</label>
                    <source_model>Magento\Config\Model\Config\Source\Yesno</source_model>
                </field>
                <field id="head_title" translate="label comment" type="text" sortOrder="2"
showInDefault="1" showInWebsite="1" showInStore="1">
                    <label>Head title</label>
                    <comment>Fill head title of news list page at here</comment>
                    <validate>required-entry</validate>
                </field>
                <field id="lastest_news_block_position" translate="label" type="select"
sortOrder="3" showInDefault="1" showInWebsite="1" showInStore="1">
                    <label>Lastest news block position</label>
                    <source_model>
                        Tutorial\SimpleNews\Model\System\Config\LastestNews\Position
                    </source_model>
                </field>
            </group>
        </section>
    </system>
</config>
As you see, I used a custom source model in this file (Tutorial\SimpleNews\Model\System\Config\LastestNews\Position), we will learn more about it with the step 2.
Step 2: Create a custom source model.
- Create file: app/code/Tutorial/SimpleNews/Model/System/Config/LastestNews/Position.php and insert this following code into it:
<?php

namespace Tutorial\SimpleNews\Model\System\Config\LastestNews;

use Magento\Framework\Option\ArrayInterface;

class Position implements ArrayInterface
{
    const LEFT      = 1;
    const RIGHT     = 2;
    const DISABLED  = 0;

    /**
     * Get positions of lastest news block
     *
     * @return array
     */
    public function toOptionArray()
    {
        return [
            self::LEFT => __('Left'),
            self::RIGHT => __('Right'),
            self::DISABLED => __('Disabled')
        ];
    }
}
This custom source model will return values (Left, Right, Disabled) for the select box.
Step 3: Create a role for this configuration section.
- Create file: app/code/Tutorial/SimpleNews/etc/acl.xml (Purpose: This file will create a role for your configuration section) and insert this following code into it:
<?xml version="1.0"?>

<config xmlns:xsi="http://www.w3.org/2001/XMLSchema-instance"
xsi:noNamespaceSchemaLocation="../../../../../lib/internal/Magento/Framework/Acl/etc/acl.xsd">
    <acl>
        <resources>
            <resource id="Magento_Backend::admin">
                <resource id="Magento_Backend::stores">
                    <resource id="Magento_Backend::stores_settings">
                        <resource id="Magento_Config::config">
                            <resource id="Tutorial_SimpleNews::system_config"
title="Simple News Section" />
                        </resource>
                    </resource>
                </resource>
            </resource>
        </resources>
    </acl>
</config>
Step 4: Set default values for the configurations.
- Create file: app/code/Tutorial/SimpleNews/etc/config.xml and insert this following code into it:
<?xml version="1.0"?>

<config xmlns:xsi="http://www.w3.org/2001/XMLSchema-instance"
xsi:noNamespaceSchemaLocation="../../Core/etc/config.xsd">
    <default>
        <simplenews>
            <general>
                <enable_in_frontend>1</enable_in_frontend>
                <head_title>Tutorial - Simple News</head_title>
                <lastest_news_position>1</lastest_news_position>
            </general>
        </simplenews>
    </default>
</config>
These configurations are same in Magento 1.x.
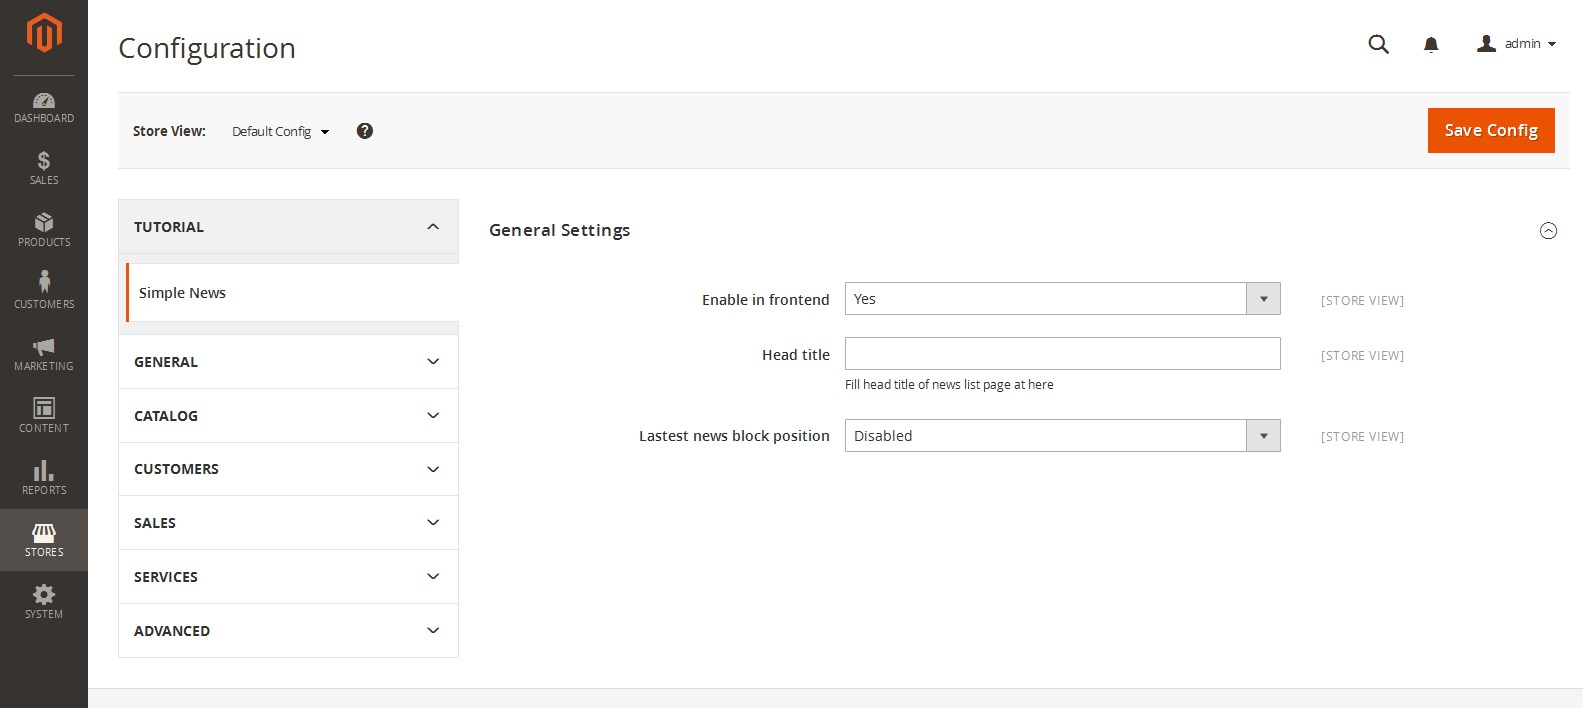
Finally, access to the backend site and see your result in Stores > Settings > Configuration section:
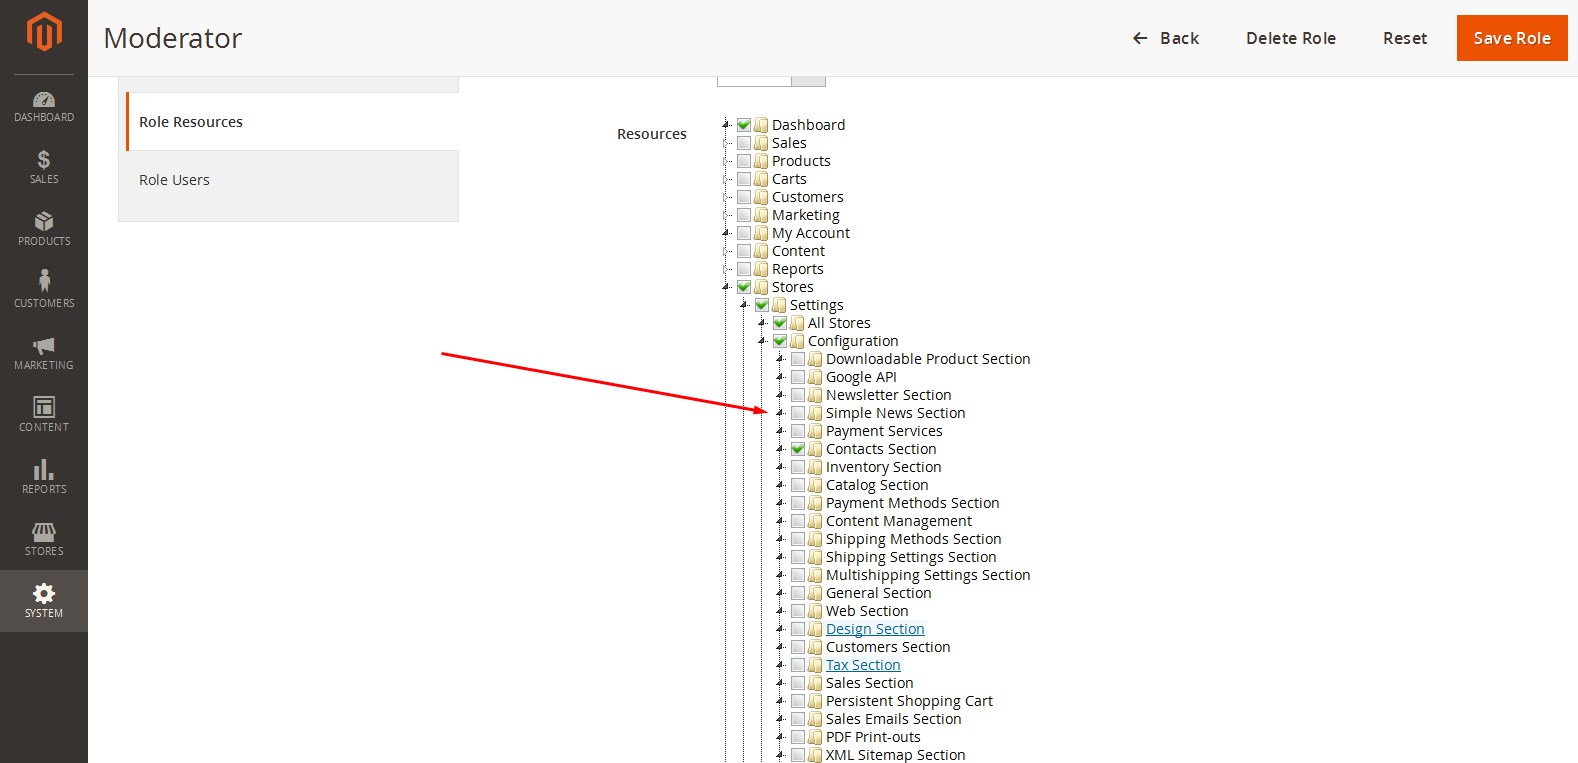
And this is the additional role (System > Permissions > User Roles):
I hope this tutorial is useful for you. In next tutorials, I will introduce you “Adding new menu item via backend in custom module”. See you again in our next Magento 2 tutorial.
If you have any problem or ideas don’t hesitate to discuss with us through our Facebook fanpage.
Related Posts

How to use Model and Collection in Magento 2

Create a module with custom database table in Magento 2
How to create a simple module in Magento 2.0